
Excerpt from an article in the San Antonio-Express News, MySA.com, 10/25/2005. Printed with permission here. Read my bilingual picture book, Lupita’s Papalote, for a story about a little girl and her homemade kite.
 Materials
- 2 small dowels
- 2 sheets of newspaper comic strips
- Template to use for cutting sail
- Fabric for tail
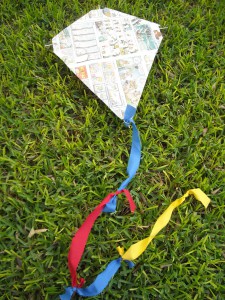
- Kite string for the frame
- String for flying
- Glue
- Pencil
- Scissors
Construction
- Cut dowels to appropriate size – 24″x20″ (large kite) – 14 1/2″ x 12″ (small kite)
- Splice the end of each dowel for the kite string.
- Place the short dowel on the top of the long dowel, approximately 1/3 way down the long dowel. For the larger kite, the intersection on the short dowel should be at 10 inches. For the smaller kite, the intersection on the short dowel should be at 6 inches.
- Use kite string to secure the two dowels in place to make the “bones” of the kite.
- Thread kite string rhough the spliced end of each dowel.
- Tie the string firmly in place.
- Spread an open comic section page on the table.
- Use a template to cut out a sail from the comic paper, cutting a little larger than needed.
- Lay the comic page sail on the table; place the dowel frame on top.
- Glue the outside of the comic paper to the kite string.
- Construct a tail from fabric, and/or ribbon.
- Attach the tail to the end of the longest dowel.
- Make a bridle for the front of the kite by tying string to the end of each dowel. Connect each piece so it intersects in the middle of the kite.
- Attach string for flying.
- Happy Kite Flying!!!